Weather App Using React

• A Computer engineering 👨🎓 who loves technology and computer science. • I am a Web Developer specialized in MERN stack and nexjs, and I use Tailwind. I worked on various projects on full stack and want to contribute more to the web dev community. •Started learning about web3 and building some fantastic projects on Polygon. • I have started blogging my tech journey and also post some insightful content on new concepts.
How to Create a React App
To create our react application, type npx create-react-app <Your app name> in your terminal, or npx create-react-app my-weather-app in this case.
You'll see that the packages are being installed.
Once the packages are done, go into the project folder and type npm start.
You'll see the default React template, like this:
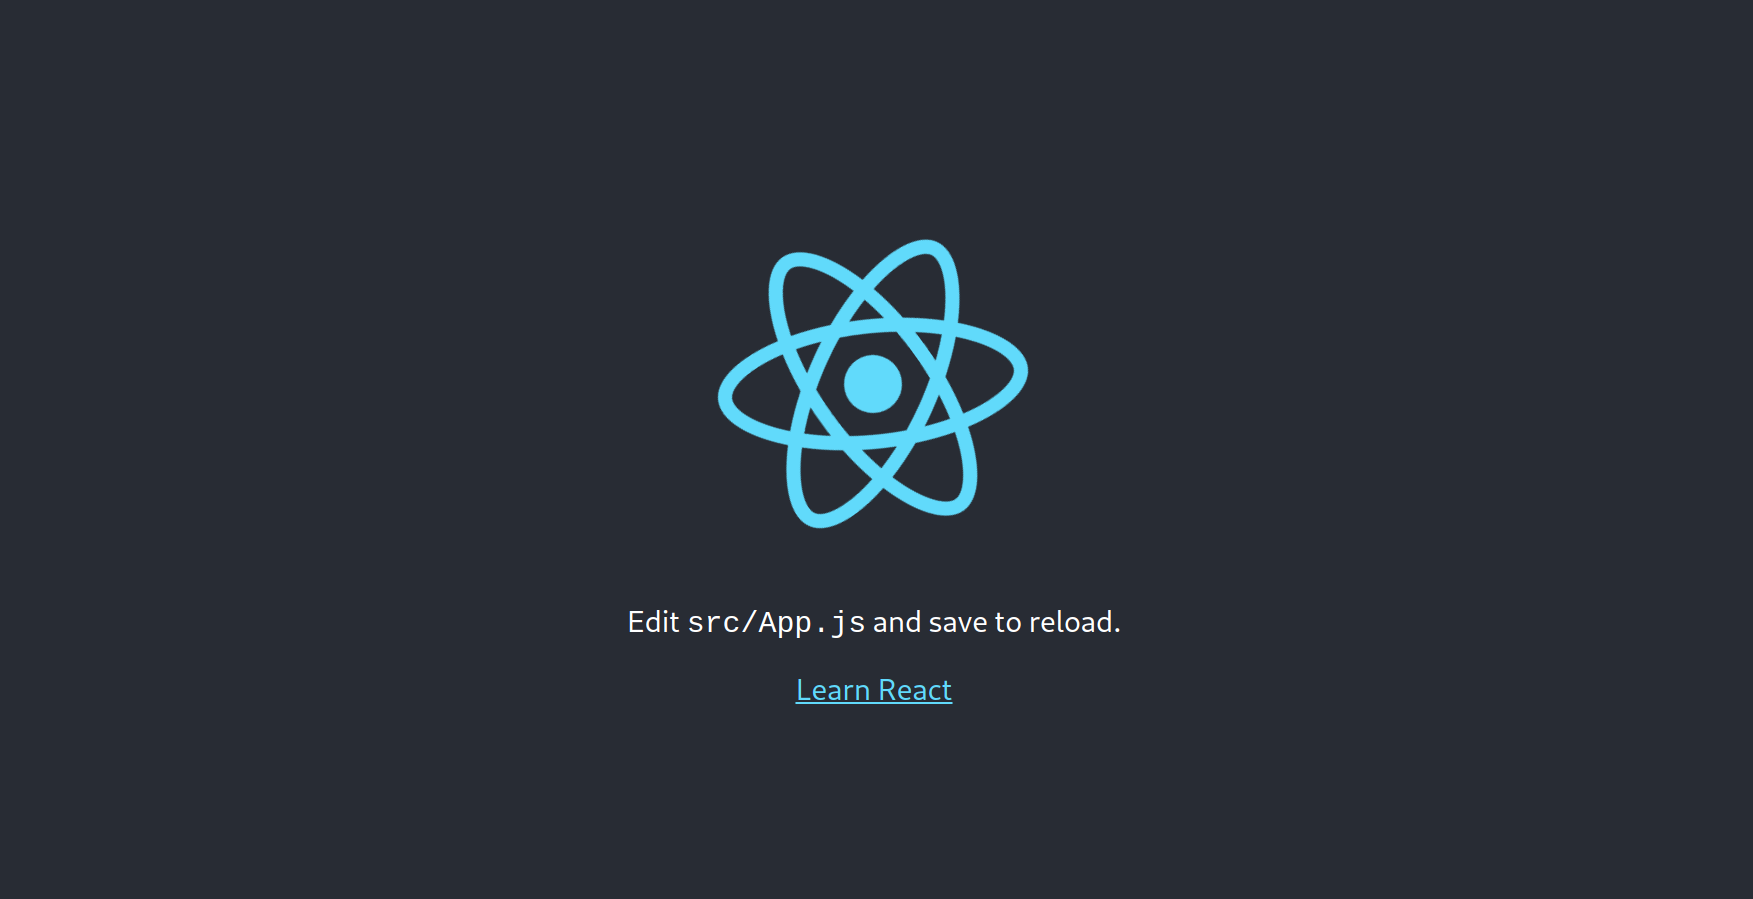
In your app.js file, clear everything inside the div tag. Remove the logo import.
Once you have done that, you will receive a blank screen on the output.
Installing Packages
To make this application more attractive, we need some external packages. So, let's install them.
npm install luxon moment
We will be using moment library for fetching date and time.
Styling
We will be using Tailwind for the styling part
Follow this link for the Documentation.
Creating our weather app
To make our weather application work, we need OpenWeatherMap, a third-party API that lets us fetch the weather data.
Go to https://home.openweathermap.org/users/sign_up and create your own account.
After you are done, click on the API option on the Navigation bar. You'll see options like Current Weather Data, Hourly 4-hour forecasts, 16-day forecasts, and others. These are API endpoints that you'll need to fetch the data.

You also need an API key to call these APIs. To get your API key, click on your username in the top right corner, and then on "my API keys".
Create an API key if it doesn't already exist.
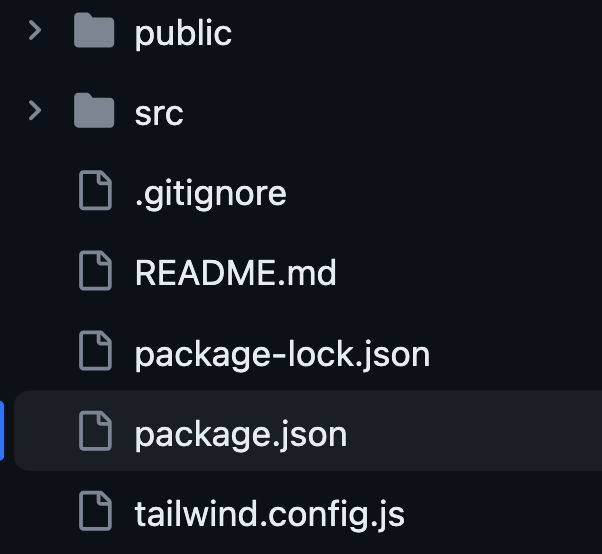
In your main app folder, create a file called .env.
This environment variable file will contain all your API endpoints and keys.
REACT_APP_API_URL = 'https://api.openweathermap.org/data/2.5'
REACT_APP_API_KEY = Paste your API key here.
REACT_APP_ICON_URL = 'https://openweathermap.org/img/w'
Paste your copied API key in the REACT_APP_API_KEY variable.
Configuring the files
Go to app.js in the src folder and import useState.
import React, { useEffect, useState } from "react";

function App() {
  const [query,setQuery] = useState({q:'delhi'})
  const [weather,setWeather] = useState(null)

  useEffect(()=>{
    const fetchWeather = async ()=>{
      await getFormatWeather({...query,units:'metric'}).then(
        (data)=>{
          setWeather(data)
          console.log(data);
        })
      }
      fetchWeather()
  },[query]);
}
We are using useEffect to get real-time data from our API.
Getting Data from API
In your src folder create a folder weather-info. Inside that creat a file Weather.jsx.
We will format our data and Date, Time using Luxom.
import React, { DateTime } from "luxom";
We are going to fetch the location using two methods. One is current location and second, using search.
To implement the search bar we will use URL object.
In your weather.jsx copy this code,
const api = process.env.REACT_APP_API_KEY
const api_url = process.env.REACT_APP_API_LINK

const getWeather = (infoType,searchParam)=>{
    const url = new URL(api_url+infoType)
    url.search = new URLSearchParams({...searchParam,appid:api})
    return fetch(url).then((res)=> res.json())
};
console.log(getWather());
We have used two parameters in this function. First is infoType, which is going to take the API key and matric value, the second one searchParam is used to take the city id from the search box which we are going to implement.
You will get an output like this in your console.
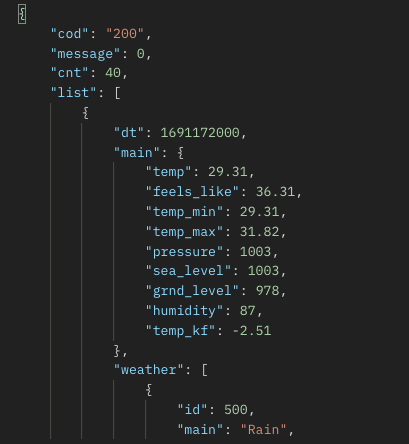
Let's configure our output to the current date and time.
const formatWeather = (data)=>{
    const {
        coord: { lat, lon },
        main: { temp, feels_like, temp_min, temp_max, humidity },
        name,
        dt,
        sys: { country, sunrise, sunset },
        weather,
        wind: { speed },
    } = data; //Destructuring of data
    const {main:details,icon} = weather[0]
    return {
        lat,
        lon,
        temp,
        feels_like,
        temp_min,
        temp_max,
        humidity,
        name,
        dt,
        country,
        sunrise,
        sunset,
        details,
        icon,
        speed,
      };
}
This function is used to get the data in the way we want excluding unnecessary information.
Now it's time to use the DateTime object provided by luxon. We will create a function that will convert the date and time to the correct time zone.
const formatToLocalTime = (
    secs,
    zone,
    format = "cccc, dd LLL yyyy' | Local time: 'hh:mm a"
) => DateTime.fromSeconds(secs).setZone(zone).toFormat(format);
const getFormatWeather = async (searchParam)=>{
    const formattedCurrentWeather= await getWeather('weather',searchParam).then(formatWeather)
    const { lat, lon } = formattedCurrentWeather;
    const formattedForecastWeather = await getWeather('weather', {
        lat,
        lon,
        units: searchParam.units,
    });
    return { ...formattedCurrentWeather, ...formattedForecastWeather };
    // return formattedCurrentWeather;
}
This is how your weather.jsx should look like,
import { DateTime } from "luxon";

const api = process.env.REACT_APP_API_KEY
const api_url = process.env.REACT_APP_API_LINK

const getWeather = (infoType,searchParam)=>{
    const url = new URL(api_url+infoType)
    url.search = new URLSearchParams({...searchParam,appid:api})
    return fetch(url).then((res)=> res.json())
};

const formatWeather = (data)=>{
    const {
        coord: { lat, lon },
        main: { temp, feels_like, temp_min, temp_max, humidity },
        name,
        dt,
        sys: { country, sunrise, sunset },
        weather,
        wind: { speed },
    } = data;
    const {main:details,icon} = weather[0]
    return {
        lat,
        lon,
        temp,
        feels_like,
        temp_min,
        temp_max,
        humidity,
        name,
        dt,
        country,
        sunrise,
        sunset,
        details,
        icon,
        speed,
      };
}

const formatToLocalTime = (
    secs,
    zone,
    format = "cccc, dd LLL yyyy' | Local time: 'hh:mm a"
) => DateTime.fromSeconds(secs).setZone(zone).toFormat(format);

const getFormatWeather = async (searchParam)=>{
    const formattedCurrentWeather= await getWeather('weather',searchParam).then(formatWeather)
    const { lat, lon } = formattedCurrentWeather;
    const formattedForecastWeather = await getWeather('weather', {
        lat,
        lon,
        units: searchParam.units,
    });
    return { ...formattedCurrentWeather, ...formattedForecastWeather };
    // return formattedCurrentWeather;
}

const iconUrlFromCode = (code) =>
(`http://openweathermap.org/img/wn/${code}@2x.png`)

export default getFormatWeather;
export {formatToLocalTime,iconUrlFromCode}
Creating Weather Component UI
Create a component folder under src. In that folder create WeatherData.jsx file.
In WeatherData.jsx we are going to call all the data using props from our weather.jsx file which we have configured in the previous section.
First import icons required for the UI from IconScout.
import {UilTemperature,UilTear,UilWind,UilSun,UilSunset} from "@iconscout/react-unicons";
import { iconUrlFromCode } from "../weather-info/weather";
Now in the main function, we are going to implement our UI for Weather component.
function WeatherData({weather:{details,icon,temp,temp_min,temp_max,sunrise,sunset,
    speed,
    humidity,
    feels_like}})
    {
    return(
        <div>
            <div className="flex items-center justify-center py-6 text-xl text-cyan-300">
                <p>{details}</p>
            </div>
            <div className="flex flex-row items-center justify-between text-white py-3">
                <img src={iconUrlFromCode(icon)} alt="" className="w-20"/>
                <p className="text-5xl">{temp.toFixed()}°C</p>
                <div className="flex flex-col space-y-2">
                    <div className="flex font-light text-sm items-center justify-center">
                        <UilTemperature size={18} className="mr-1" />
                        Feels Like:
                        <span className="font-medium ml-1">{feels_like}°C</span>
                    </div>
                    <div className="flex font-light text-sm items-center justify-center">
                        <UilTear size={18} className="mr-1" />
                        Humidity:
                        <span className="font-medium ml-1">{humidity} %</span>
                    </div>
                    <div className="flex font-light text-sm items-center justify-center">
                        <UilWind size={18} className="mr-1" />
                        Wind:
                        <span className="font-medium ml-1">{speed} Kmph</span>
                    </div>
                </div>
            </div>
            <div className="flex flex-row items-center justify-center space-x-2 text-white text-sm py-3">
                <UilSun />
                <p className="font-light">
                Rise:{" "}
                <span className="font-medium ml-1">
                    {new Date(sunrise * 1000).toLocaleTimeString("en-IN", {})}
                </span>
                </p>
                <p className="font-light">|</p>

                <UilSunset />
                <p className="font-light">
                    Set:{" "}
                    <span className="font-medium ml-1">
                    {new Date(sunset * 1000).toLocaleTimeString("en-IN", {})}
                    </span>
                </p>
                <p className="font-light">|</p>

                <UilSun />
                <p className="font-light">
                High:{" "}
                <span className="font-medium ml-1">
                    {temp_max.toFixed()}°C
                </span>
                </p>
                <p className="font-light">|</p>

                <UilSun />
                <p className="font-light">
                Low:{" "}
                <span className="font-medium ml-1">
                    {temp_min.toFixed()}°C
                </span>
                </p>
            </div>
        </div>
    )
}
export this function and we are ready with our weather card.
Building Search component
Now we have to implement the search bar for the UI.
In your components folder create a Search.jsx file.
We will use the useState hook to manage the search parameter state.
import React, { useState } from "react";
import { UilSearch,UilLocationPoint } from '@iconscout/react-unicons'
To get the city id from the name lets create a function using useState.
 const [city,setCity] = useState('');
 function handleSearchClick(){
        if(city){
            setQuery({
                q:city
            })
        }
    }
This handleSearchClick will be used in our search button.
To get the current location by clicking on the location icon we will implement another function which will be handled onClick.
We will use navigator.geolocation.getCurrentPosition function to fetch the latitude and longitude.
function handleLocationClick(){
        if(navigator.geolocation){
            navigator.geolocation.getCurrentPosition(function(position) {
                let lat = position.coords.latitude
                let lon = position.coords.longitude
                setQuery({
                    lat,lon
                })
            });
        }
    }
Next step is to create a search box.
<div className="flex flex-row justify-center my-6">
            <div className="flex flex-row w2/3 items-center justify-center space-x-4">
                <input
                    value={city}
                    onChange={(e) =>setCity(e.currentTarget.value)}
                    type="text"
                    placeholder="city"
                    className="text-xl font-light p-2 capitalize w-full shadow-xl placeholder:lowercase focus:outline-none"
                />
                <UilSearch
                    size={25}
                    className="text-white cursor-pointer transition ease-out hover:scale-125"
                    onClick={handleSearchClick}
                />
                <UilLocationPoint
                    size={25}
                    className="text-white cursor-pointer transition ease-out hover:scale-125"
                    onClick={handleLocationClick}
                />
            </div>
</div>
This is how our final search.jsx will look should look like.
import React, { useState } from "react";
import { UilSearch,UilLocationPoint } from '@iconscout/react-unicons'

function Search({setQuery}){
    const [city,setCity] = useState('');
    function handleSearchClick(){
        if(city){
            setQuery({
                q:city
            })
        }
    }
    function handleLocationClick(){
        if(navigator.geolocation){
            navigator.geolocation.getCurrentPosition(function(position) {
                let lat = position.coords.latitude
                let lon = position.coords.longitude
                setQuery({
                    lat,lon
                })
            });
        }
    }
    return(
        <div className="flex flex-row justify-center my-6">
            <div className="flex flex-row w2/3 items-center justify-center space-x-4">
                <input
                    value={city}
                    onChange={(e) =>setCity(e.currentTarget.value)}
                    type="text"
                    placeholder="city"
                    className="text-xl font-light p-2 capitalize w-full shadow-xl placeholder:lowercase focus:outline-none"
                />
                <UilSearch
                    size={25}
                    className="text-white cursor-pointer transition ease-out hover:scale-125"
                    onClick={handleSearchClick}
                />
                <UilLocationPoint
                    size={25}
                    className="text-white cursor-pointer transition ease-out hover:scale-125"
                    onClick={handleLocationClick}
                />
            </div>
        </div>
    )
}

export default Search;

Connecting all together
Now let's get to our app.js file and render our components.
We have to use useState and useEffect hook.
First import all our created components.
import React, { useEffect, useState } from "react";
import "./index.css"
import Search from "./components/Search";
import WeatherData from "./components/WeatherData";
import getFormatWeather from "./weather-info/weather";
Now, create the useEffect function. Its goal is to load the functions when the application is loaded and reloaded.
const [query,setQuery] = useState({q:'delhi'})
const [weather,setWeather] = useState(null)

useEffect(()=>{
    const fetchWeather = async ()=>{
      await getFormatWeather({...query,units:'metric'}).then(
        (data)=>{
          setWeather(data)
          console.log(data);
        })
      }
      fetchWeather()
 },[query]);
Now we want our background to be changed according to the temperature so we will implement this using a function.
const formatBackground = ()=>{
    if(!weather) return 'from-cyan-400 to-blue-600'
    const threshold = 40
    if(weather.temp< threshold) return 'from-cyan-400 to-blue-600'
    return 'from-yellow-700 to-orange-700'
  }
The final step, connecting together.
<div className={`mx-auto max-w-screen-md mt-14 py-5 px-32 bg-gradient-to-br ${formatBackground()} shadow-xl shadow-gray-400`}>
      <Search setQuery={setQuery}/>
      {weather && (
        <div>
        <Time weather={weather}/>
        <WeatherData weather={weather}/>
        </div>
      )}
</div>
This is what our App.js should look like.
import React, { useEffect, useState } from "react";
import "./index.css"
import Search from "./components/Search";
import Time from "./components/Time";
import WeatherData from "./components/WeatherData";
import getFormatWeather from "./weather-info/weather";

function App() {
  const [query,setQuery] = useState({q:'delhi'})
  const [weather,setWeather] = useState(null)

  useEffect(()=>{
    const fetchWeather = async ()=>{
      await getFormatWeather({...query,units:'metric'}).then(
        (data)=>{
          setWeather(data)
          console.log(data);
        })
      }
      fetchWeather()
  },[query]);

  const formatBackground = ()=>{
    if(!weather) return 'from-cyan-400 to-blue-600'
    const threshold = 40
    if(weather.temp< threshold) return 'from-cyan-400 to-blue-600'
    return 'from-yellow-700 to-orange-700'
  }

  return (
    <div className={`mx-auto max-w-screen-md mt-14 py-5 px-32 bg-gradient-to-br ${formatBackground()} shadow-xl shadow-gray-400`}>
      <Search setQuery={setQuery}/>
      {weather && (
        <div>
        <Time weather={weather}/>
        <WeatherData weather={weather}/>
        </div>
      )}
    </div>
  );
}

export default App;
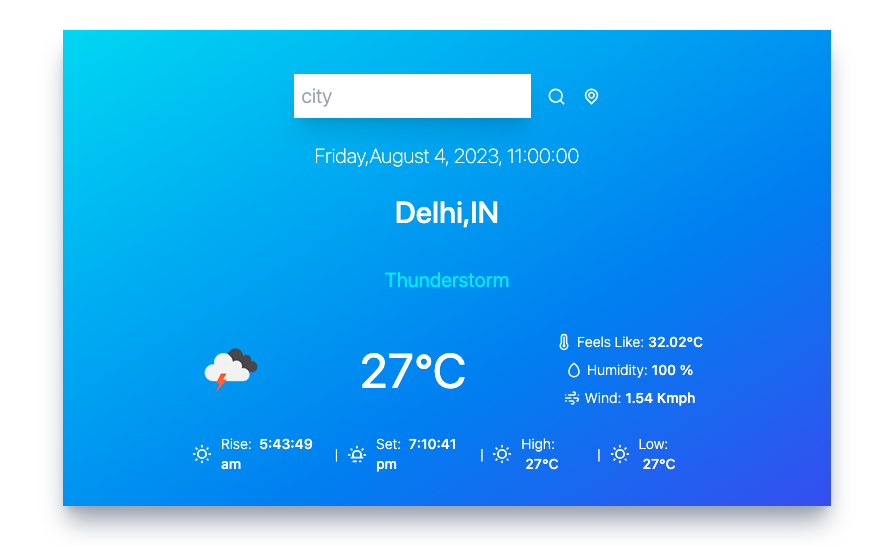
That's all, folks. You can add more features to the app, like a five-day forecast, icons, and more.
You can find the code on github if you want to experiment further.
Follow me on socials if you have read this so far and found it insightful.